
Slow Internet connection, especially on the PC is the most frustrating thing in the technology era. That’s why people want to know how to increase Internet speed in Windows 10. This is a common problem for most users. To increase productivity, everyone wants to speed up Internet on Windows 10 computers.
There is no doubt, that this is the best Windows operating system developed by Microsoft. When it launched for the first time, the company offered Windows 10 as a free upgrade for genuine Windows 7, 8, and 8.1 users. According to the Verge, there are 400 Million active users of Windows 10, which is four times more popular than macOS.
These numbers make it the World’s most popular computer operating system. Nowadays, everything in the world has been digitalized. You can perform any task from any corner of the world with the help of the Internet. That’s why it is necessary to increase Internet speed in Windows 10.
How to Increase Internet Speed on Windows 10 Home and Pro
Your Windows PC will be just like a dumb box without an Internet connection. If the Internet connection is slow, then you feel like hell. That’s why here are the tested killer tips to fix slow internet speed on Windows 10.
Here, I have shared every possibility to speed up the Internet bandwidth. Ready for some killer tips to fix slow internet speed on Windows 10/11.
1. Pause Windows 10 Updates
The worst feature that most people don’t like is the automatic Windows update. Now, you don’t have any control over the updates and you can’t check the update size before downloading.
Whenever there is an update available for Windows 10, it automatically downloads and installs it in your system. Downloading a large file causes slow Internet on your PC. Well, there is a way to pause the Windows update for 35 days. Let’s check it out how.
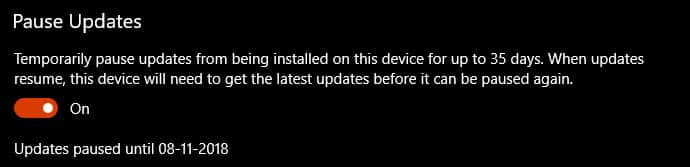
Navigate to the following path on your computer, Settings → Update & security → Windows update → Advanced options, and turn on the “Pause Updates” option. That’s it.
From now on, you’ll not get any updates until 35 days. After the period, you have to follow the steps again to extend it for the next 35 days.
2. Turn on Metered Connection
Windows 8 is the first operating system where Microsoft first time introduced the Metered connection feature. This is a useful feature for those who have a limited Internet data connection.
If any of your connections are configured as a metered connection, the system will only download the automatic background updates when you are on your normal connection.
Windows 10 is designed for computers with unlimited Internet connections. It uses the maximum bandwidth of your data connection to download and upload data.
This is why you face slow internet speed on your computer. Well, by turning the metered connection on the current network, you can solve this problem. Let’s check out how.
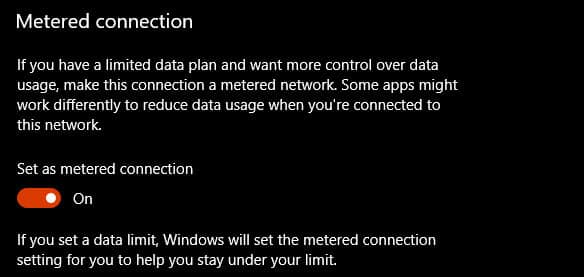
To do that, navigate to Settings → Network & Internet and select the currently connected network (WIFI or Ethernet). Here you have to turn on the “Set as metered connection” option. That’s it.
3. Turn Off Background Apps
You can stop apps from running in the background to save battery (If you have a laptop), bandwidth, and some system resources.
Most of the apps you install from the Store have been designed to run in the background. This is another reason for the slow internet on Windows 10. You can stop them to improve Internet speed in Windows 10.

To do that, open Settings → Privacy → Background apps, and here turn off the “Let apps run in the background” option. That’s it. Now, none of the apps downloaded from the Windows Store will run or update without your permission.
You can also use ReviOS to eliminate unnecessary programs.
4. Disable Windows Update Service
You should always keep your Windows operating system updated to get the benefits of most of the features.
Disabling Windows updates is not recommended. If you are using a mobile carrier for the Internet, then you can stop this service to maximize Internet speed in Windows 10.
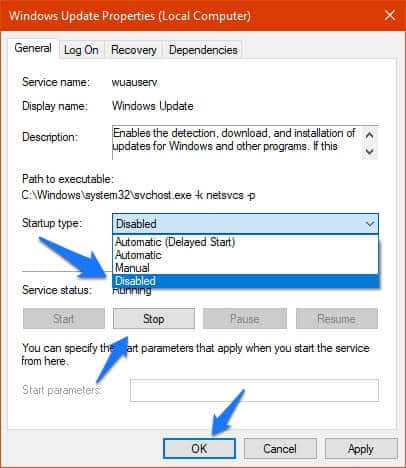
First of all, search services in the Windows 10 Start menu and open it. Next, you have to look for “Windows Update” and open it. Like the above picture, select “Disabled” from the Startup type and click on the “Stop” button. That’s it.
Now the Windows update service will not run automatically. You can change it anytime to automatic to start the service again.
5. Flush DNS Cache
DNS stands for Domain Name System. It helps the computer to convert the domain name (example.com) to an IP address (192.10.32.10). Your computer holds all these records to speed up the connection process. These records are called DNS cache.
If these records are too old and consist of different errors, then it’s ideal to clear these files and let your system fetch them once again. To do that,

1. Press Win + R from your computer, type cmd on the box and hit Enter.
2. Now type, ipconfig /flushdns and press ENTER. That’s it.
You’ll get a successful message, like the Windows IP Configuration. Successfully flushed the DNS Resolver Cache. Now, you are one step ahead in increasing your internet speed on Windows 10
6. Delete Prefetch and Temporary Files
The Prefetch feature was introduced with Windows XP and is still available in Windows 10 to store the specific data of different software you use on your computer to help them load faster. Like that, Temporary files are those files that different software stores in your system to hold data temporarily.
If there are a lot of junk files on your computer, then you should delete these files manually to increase the internet speed of Windows 10. To do that,
1. Press Win + R from your computer, type cmd on the box and hit Enter.
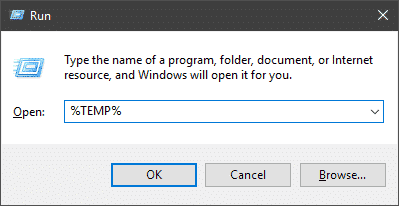
2. Type %TEMP% and press Enter to open the Temp folder. Now delete all these files on that folder.

3. After that, prefetch, press Enter to open the Prefetch folder. Now delete all these files from that folder.
That’s it. You all need to do is, restart your computer once and you are ready to enjoy the speed.
7. Close Apps that Use Too Much Bandwidth
Microsoft recently announced a new Windows 10 feature to help identify which apps are eating up your data.
If you are not using Windows 10 and are stuck with one of the previous versions, you can download a little tool called NetBalancer. It will allow you to see how much bandwidth each app is using on your network and also give the user the ability to pause any apps that are eating up too much of their Internet speed.
The app is really easy to use and all you have to do is open it up, select “more networks”, then click on your Wi-Fi connection, after that just select “start” and it will start measuring how much traffic each app is using on your network.
Is 1 GB of Internet fast?
1 GB internet speed means, 1,000 megabits per second (1 Gbps), if you are not a heavy internet user then this speed is actually very fast.
How do I speed up my network on Windows 10?
You can speed up your network on Windows 10 by closing unnecessary tabs and apps, disabling large send-offload, changing your DNS settings, and ensuring that your network adapter settings are optimized.
Fix Slow Internet in Windows 10
This is how you can increase Internet speed in Windows 10. Follow the above steps to optimize your computer and stop background apps to fix the slow Internet speed in your computer. If you have any queries related to the guide then feel free to ask by using the below comment box.


thank you so much
Very quickly this website will be famous among all blogging people, due to it’s fastidious articles or reviews.
Prefetch & temp files would not open to delete in windows 10 64 bit. I tried it several times and it still would not open.